ShareX setup
This guide provides an information on what ShareX is, how to set it up using DBH as it's "host" and how to add effects.
What ShareX is?
ShareX is a free and open source program available on windows that lets you capture or record any area of your screen and share it with a single press of a key with a feature of uploading it to host.
What's the benefit of having ShareX installed?
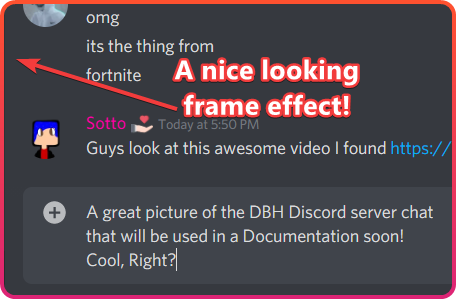
ShareX provides a feature of uploading media to a host that can bypass uploading limits of media to any of the messengers like Discord using legal way or having screenshots stored not on a desktop. Having custom frame effects like this is dope right?
How to setup?
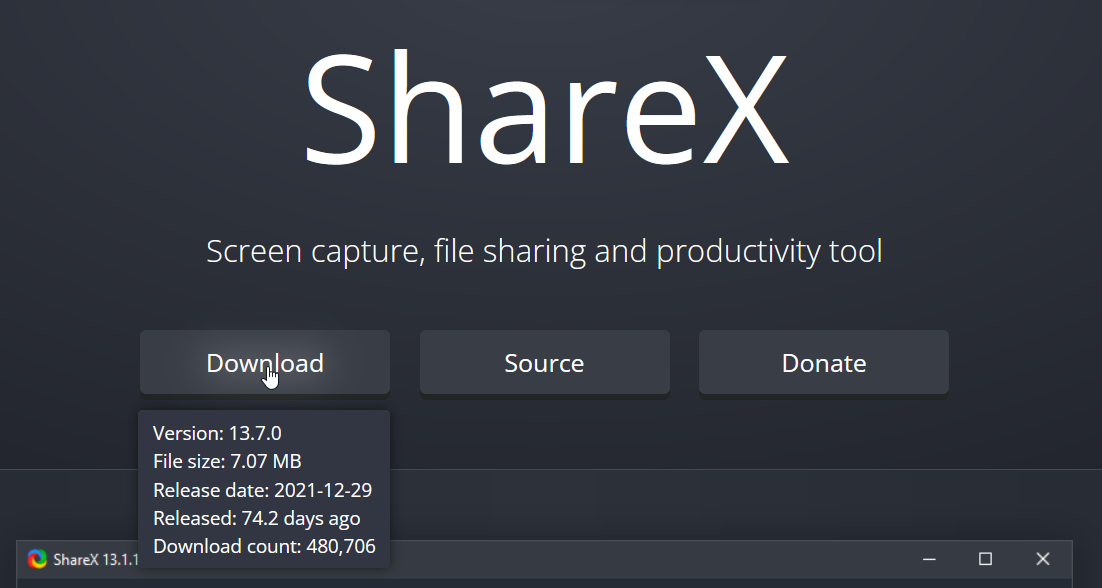
Before creating a ShareX server you have to install ShareX program on your pc using it's official website page
Create a server
To create a server, we suppose that you've already created and linked an account into the panel.
In that case, go to DBH server and run this command:
For a free server: DBH!server create sharex [optional server name]
For a donator server: DBH!server create-donator sharex [optional server name]
Configuration
This is the most difficult step, so we ask you to dedicate some time to read this article entirely
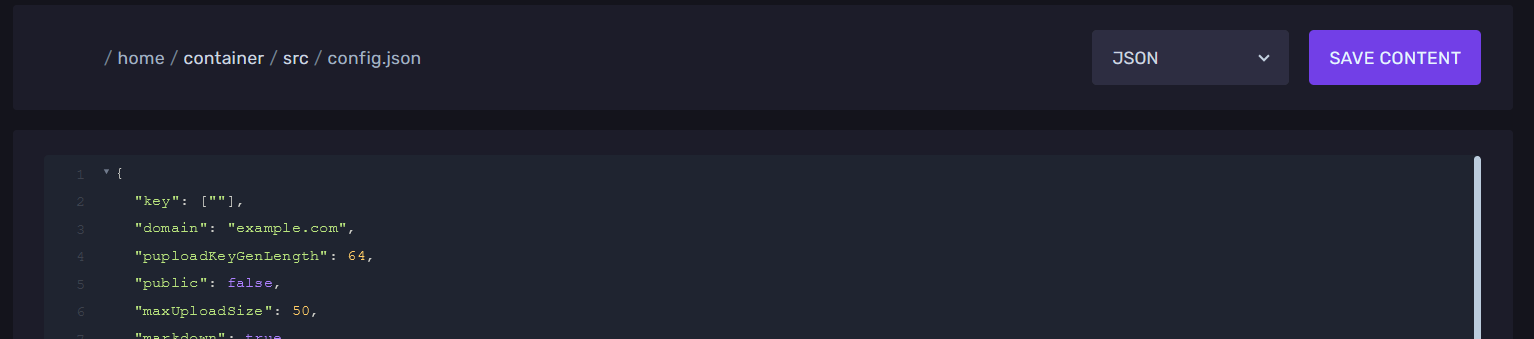
Once your server finished installing (it might take up to 2 minutes), go to the panel, then go to your server, and the to the files. Then open the src folder. Now open config.json.
Now, we're going to explain the important settings that you might need to set up:
General settings
-
key: Here you can set up the main keys. Before setting this up please go (on this doc) to your preferred configuration (private or public)
-
domain: This is important as if not set correctly, server won't work and deny all the incoming conexions. If you proxied the server, just type the proxied domain. But if you didn't and you want to use the server's default domain, insert it without the port. Example:
dono-03.danbot.host -
public: This options allows you to upload the files and see them ONLY with a key.
truefor uploads without key andfalseto accept uploads only with key. -
port and securePort: IMPORTANT STEP Here you need to put the server's port if not it won't work.
This are the important settings. For more info of another values please visit the official github repo.
Private configuration (only you can use the server)
-
Set
publicto false -
Set the key to anything random (this is because we won't use a non-admin key, i'll show you later how to set the admin one).
-
Now, in
adminobject, set your personal key, set the maximum upload size to whatever in Mb (Here's a convertor) and inallowedyou can set up all the file formats you want to upload.
Public configuration (everyone can use your server)
-
Set
publicto true -
Set key into
[""](default) to let everyone upload. -
Set your admin key.
ShareX Discord Admin Bot
First, follow this steps to create and invite your bot.
Once you created it, set the Token of the bot, the ID of the channel and the IDs of the people that can use the bot. Next set the bot's prefix and you're done.
Manage files
Your File Manager on the panel should look like this where .sxcu files will be used soon.
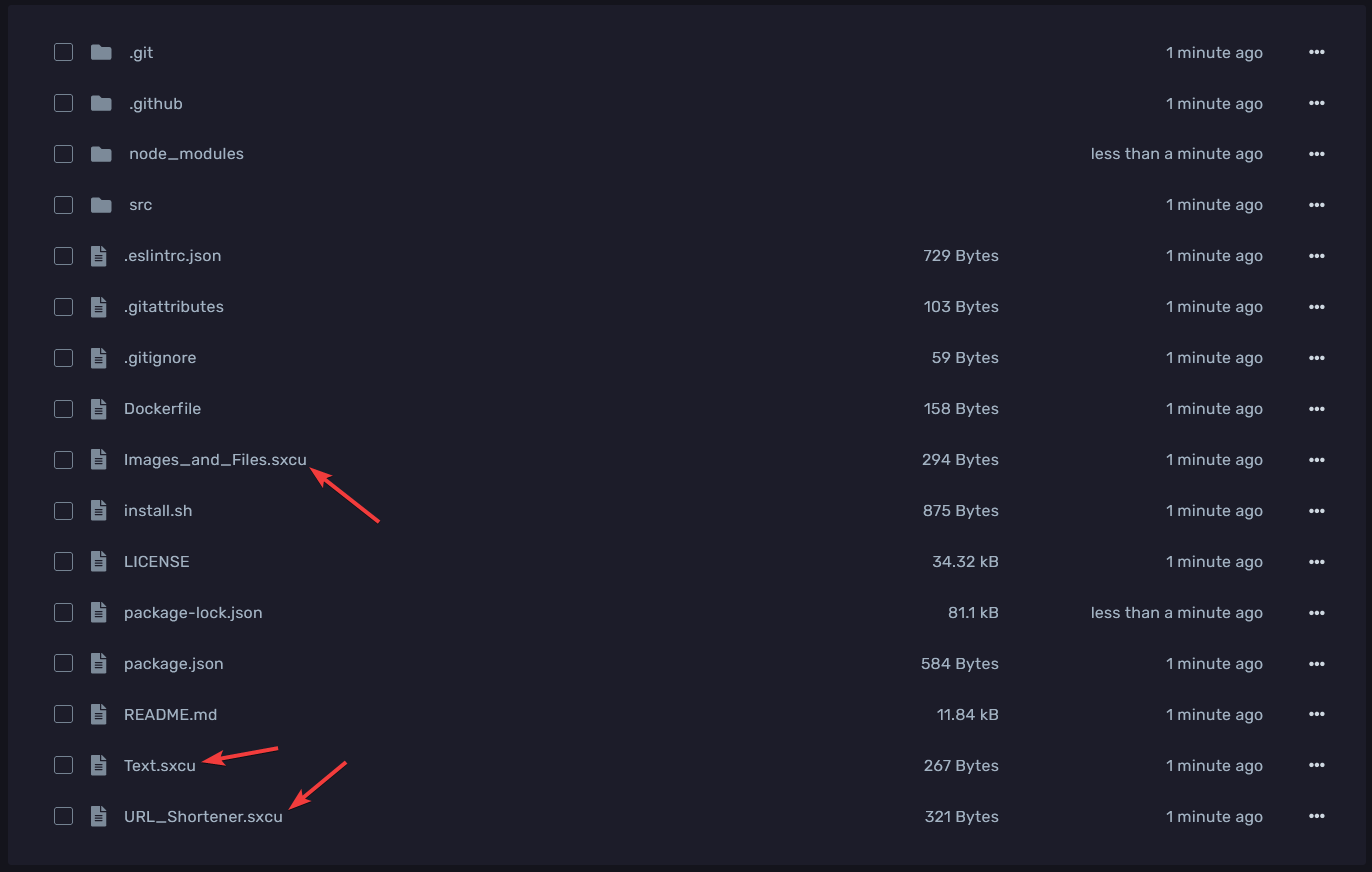
By opening these files you will find similar "templates":
Images_and_Files.sxcu
{
  "Version": "12.4.0",
  "Name": "Images_and_Files",
  "DestinationType": "ImageUploader, FileUploader",
  "RequestMethod": "POST",
  "RequestURL": "http://[YOUR_DOMAIN]/api/files",
  "Body": "MultipartFormData",
  "Arguments": {
    "key": "YOUR_PASSWORD"
  },
  "FileFormName": "fdata"
}
Text.sxcu
{
  "Version": "12.4.0",
  "Name": "Text",
  "DestinationType": "TextUploader",
  "RequestMethod": "POST",
  "RequestURL": "http://[YOUR_DOMAIN]/api/paste",
  "Body": "MultipartFormData",
  "Arguments": {
    "key": "YOUR_PASSWORD"
  },
  "FileFormName": "fdata"
}
URL_Shortener.sxcu
{
  "Version": "12.4.0",
  "Name": "URL_Shortener",
  "DestinationType": "URLShortener",
  "RequestMethod": "POST",
  "RequestURL": "http://[YOUR_DOMAIN]/api/shortener",
  "Headers": {
    "url": "$input$"
  },
  "Body": "MultipartFormData",
  "Arguments": {
    "key": "YOUR_PASSWORD"
  },
  "FileFormName": "fdata"
}
You have to either install these files or copy text in clipboard to import uploader settings soon.
Consider changing [YOUR_DOMAIN] field in "RequestURL" to your proxied domain. If you want your ShareX space to be private you have to set your own password in "key"! In src/config.json make sure to change "public", "port", "securePort", "domain" and "key"
Launch and configurate ShareX
Finish installation of ShareX and launch the program. What you have to do right now is configurate "Destinations":
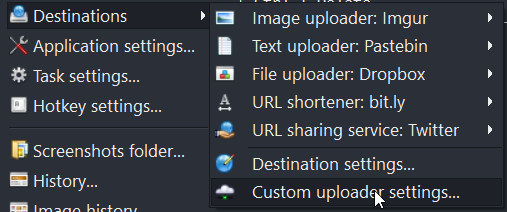
There you have to import your changed files: Text.sxcu, Images_and_Files.sxcu, URL_Shortener.sxcu.
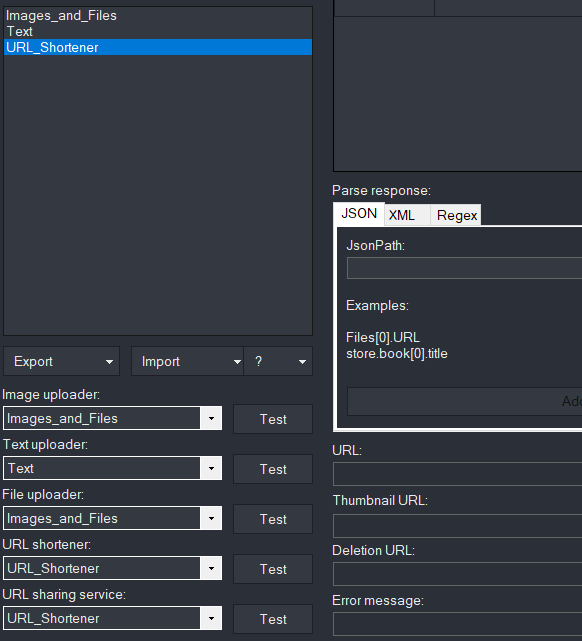
After all done, change uploader settings as in the picture
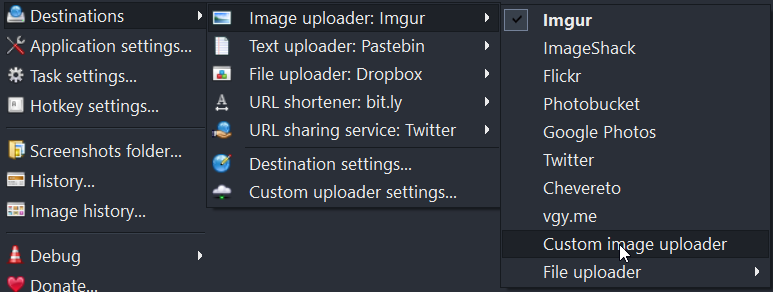
Move back and change destination uploaders to "Custom ... uploader" for every service
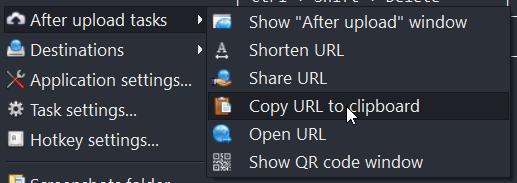
After all done you must configure "After..." triggers

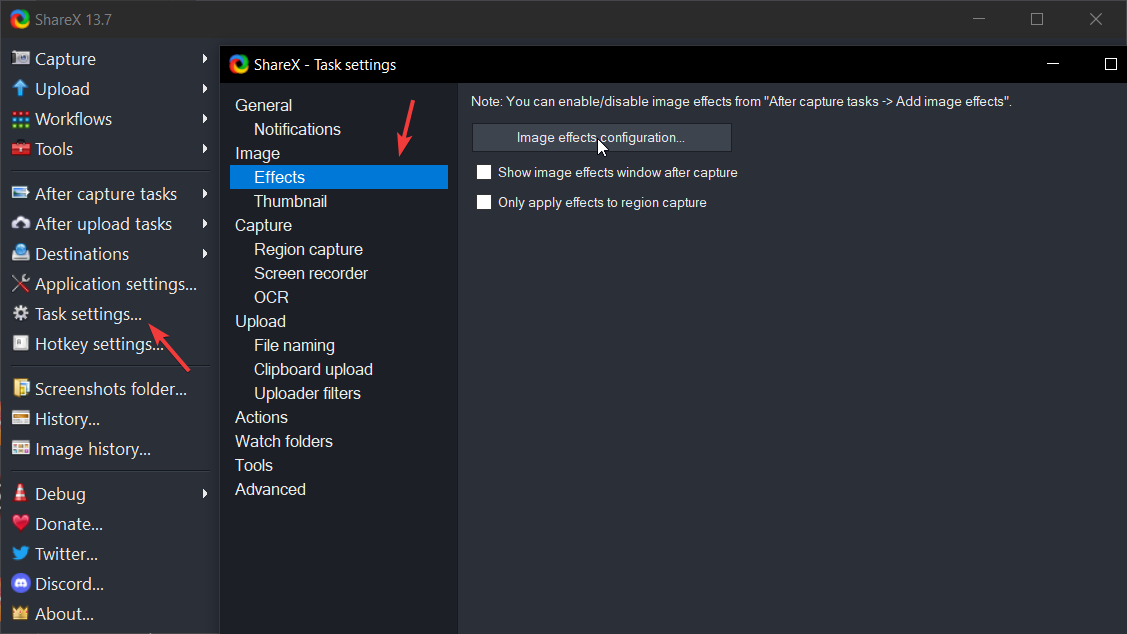
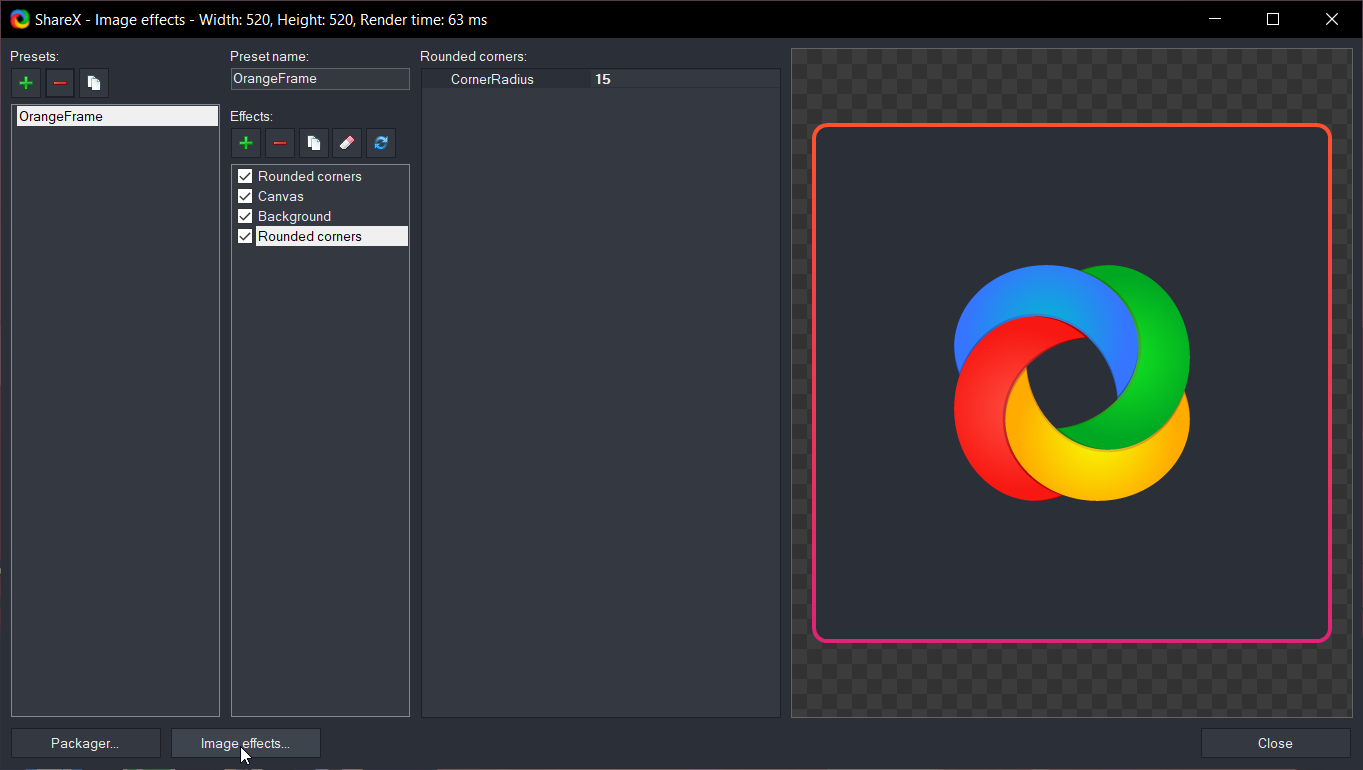
Adding frame effect
Frame effect can be automatically added if you add it in "After capture task"! To create/import these frames you have to open the Effects settings in "Task Settings"
You can manually make your own cool frame effect just like I did but using official website you can install other frame effects!
Start the server
After saving all stuff you're ready to share your cool screenshots made using ShareX!
Hope we helped you! If you think that something is wrong, please consider creating a PR in our repository.
